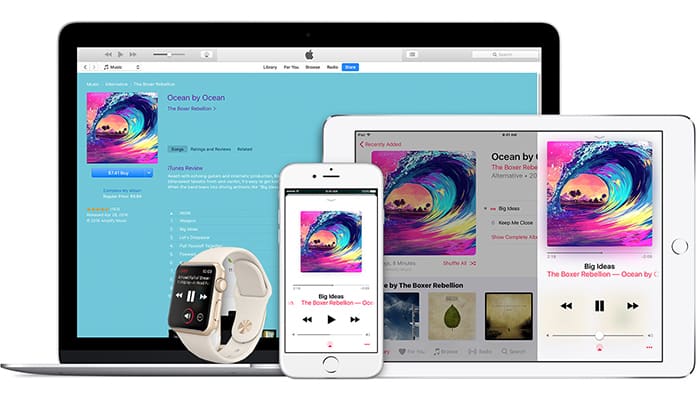
We know that we can easily listen to our favorite music on our iPhone
or iPad with Apple Music. You can add any song to your playlist, you
can make your own playlist, and you can download songs and you can
listen to your songs without the internet. Apple Music provides these
amazing features, and that’s the reason why millions of users are using
it right now. Besides listening to your favorite songs online, you can
download them as well. Consider going on a long trip where you won’t be
able to use the internet. In such situation, you will not be able to
listen to your songs as you haven’t downloaded them. Today we will
explain to you how download all Apple music to iPhone and iPad to listen
to them offline.
Step 1: Open your Music app and click on Library tab.
Step 2: Now tap on the Songs tab, and you will see your songs here in a list.
Step 3: You will have to select a song in order to download it. After selecting the song, you will see the iCloud icon button in front of the song.
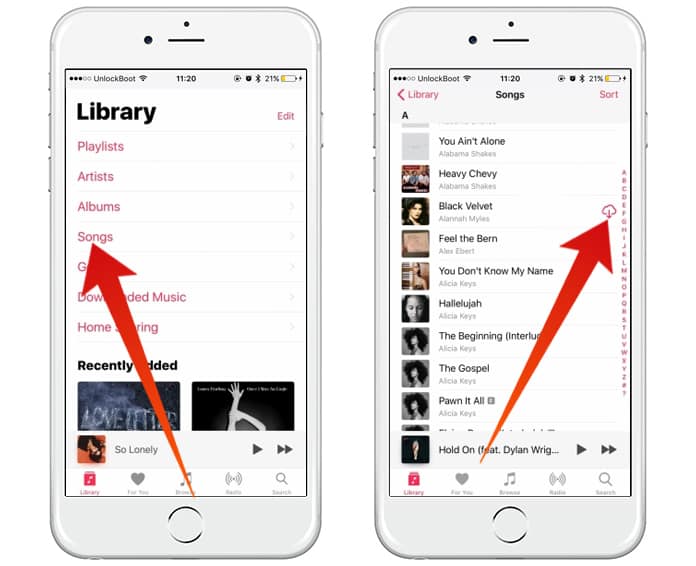
Step 4: This icon indicates that the song is not downloaded yet. Click on the icon to download this song.
You are all done! Now that song will be downloaded to your iPhone soon.
Step 1: Go to Music app and click on Library tab.
Step 2: Now go to Albums and select any album you want to download.
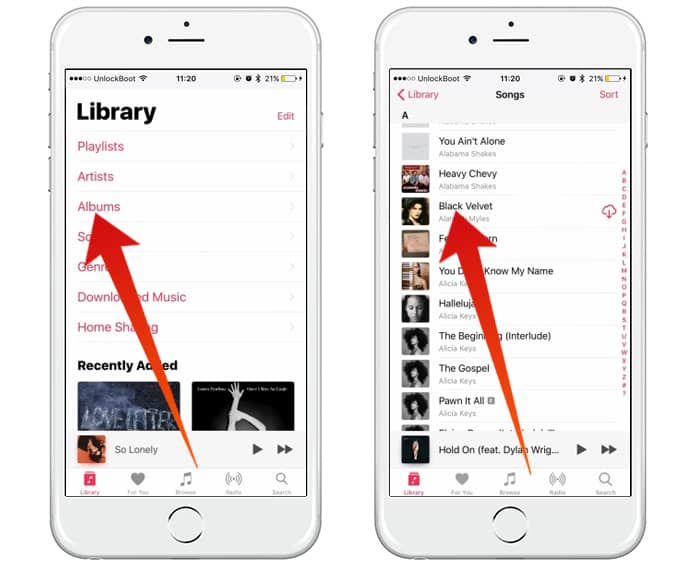
Step 3: Here you can add different albums to your playlist.
Step 4: After adding the albums to the playlist, you will see the iCloud download icon in front of the playlist icon.
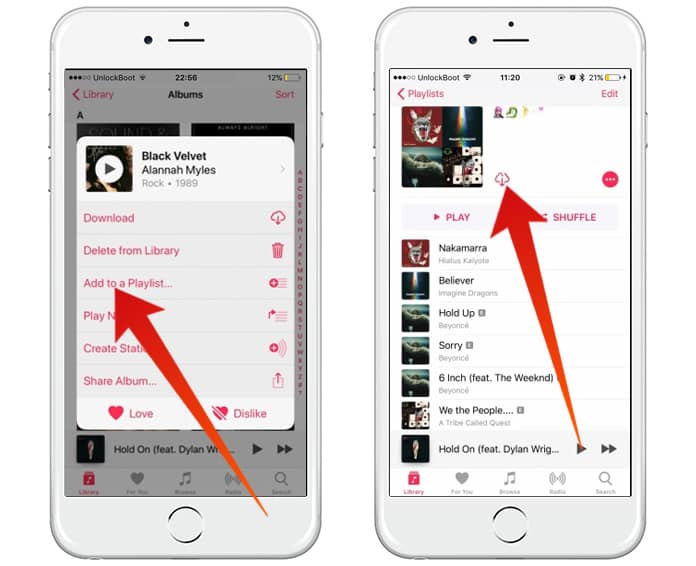
Step 5: Click on the icon and the playlist will start downloading the songs.
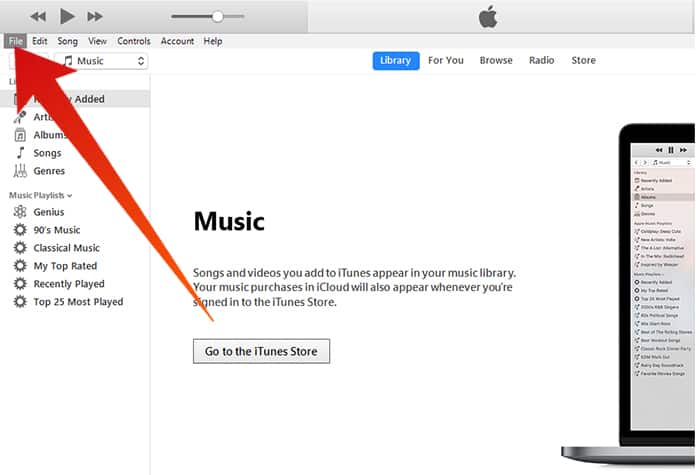
Step 1: Launch iTunes on your computer and click on the File option in the top menu.
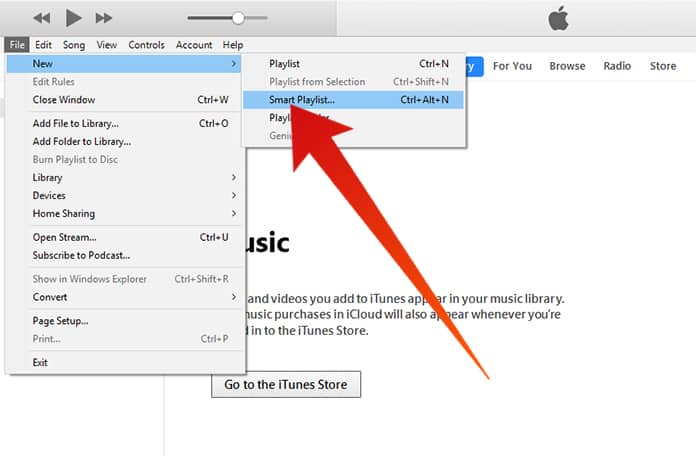
Step 2: Here click on New and select the Smart Playlist option.
Step 3: Here you will see a popup box with some different options. Here is how you can customize it.
Step 4: Now you need to “Select Time” from the second drop down box and “Is Greater Than” in the second.
Step 5: Now type 00:00 in the second menu. It shows the time duration of your songs.
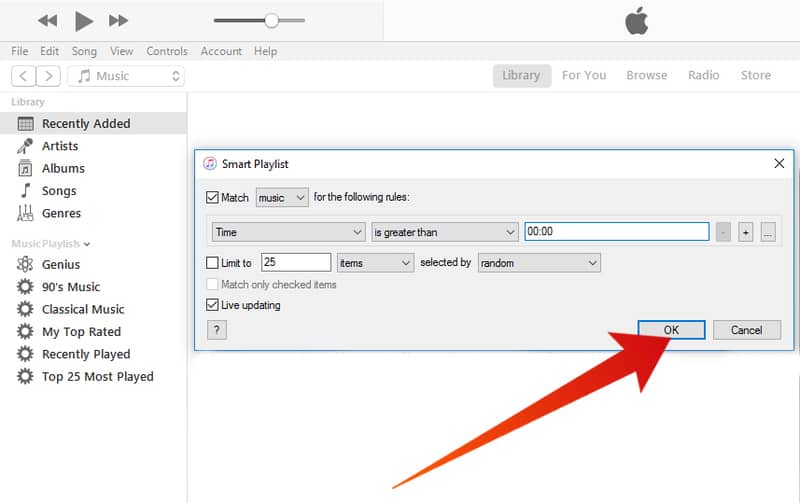
Step 6: Uncheck Limit to option and check Live updating button. And after that click OK.
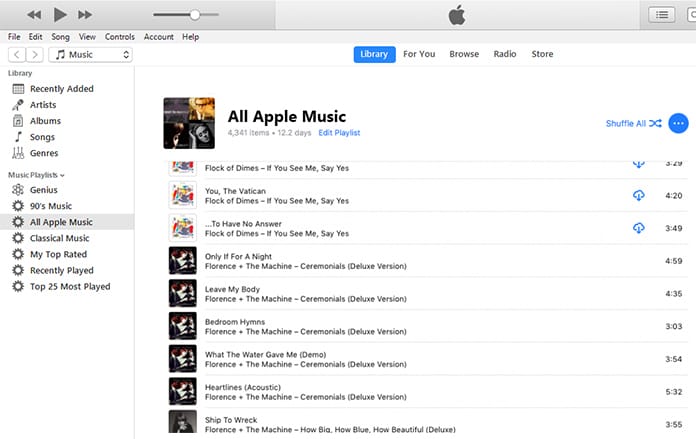
Step 7: Now come to your iPhone, open Music app and click on Playlists tab and after that open the folder with your favorite music.
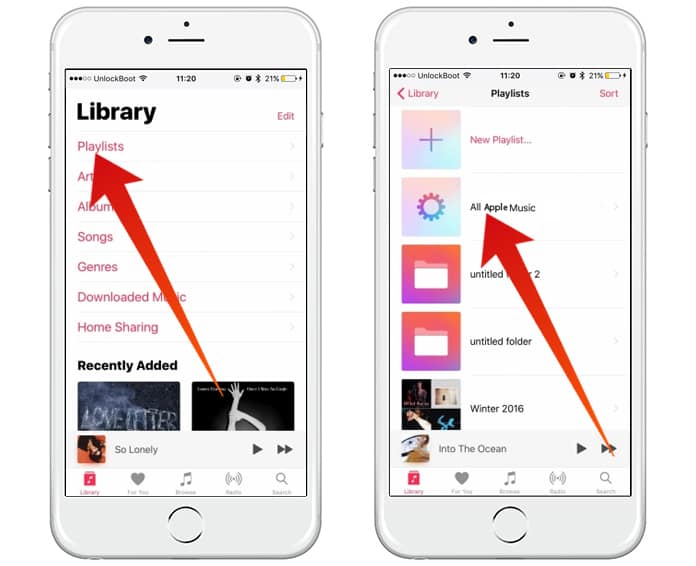
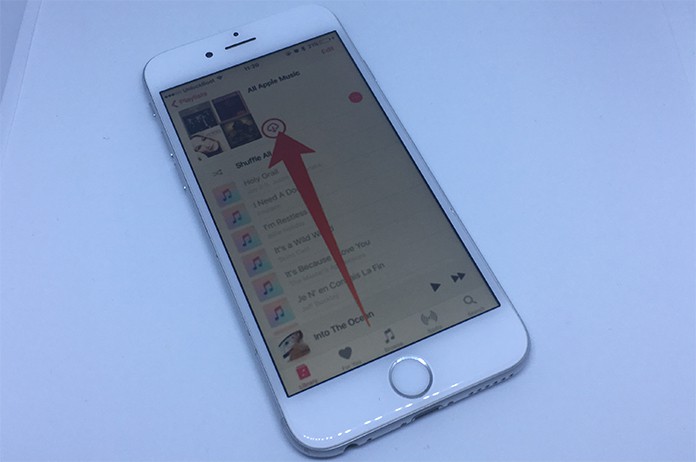
Step 8: Eventually, you will see iCloud download button in front of your playlist icon. Click on it, and it will start downloading your songs.
You can choose either method to download all Apple music to iPhone and iPad. All the methods described above are very easy to understand and perform. After downloading the songs, you will be able to listen to them without the internet.

Download All Apple Music to iPhone, iPod Touch and iPad
If you want to listen to songs from different singers you can download these songs individually. However, sometimes you may want to download the entire album and you don’t know how. Well, don’t worry because we will show you how to download all Apple music to iPhone and iPad.How to Download Individual Songs from Apple Music on iPhone, iPad or iPod Touch
If you have a number of songs on your playlist, but you listen to some particular songs repeatedly, you can simply download them. Since download will take place in your storage, you can only download some individual songs to your iPhone. Here is the process of how you can do this job.Step 1: Open your Music app and click on Library tab.
Step 2: Now tap on the Songs tab, and you will see your songs here in a list.
Step 3: You will have to select a song in order to download it. After selecting the song, you will see the iCloud icon button in front of the song.

Step 4: This icon indicates that the song is not downloaded yet. Click on the icon to download this song.
You are all done! Now that song will be downloaded to your iPhone soon.
How to Download an Entire Album from Apple Music to your iDevice
Besides downloading individual songs, you can download an entire album which is a relatively useful method. In this way, you will be able to download all the songs of that album at once. The process of download an entire album is very easy.Step 1: Go to Music app and click on Library tab.
Step 2: Now go to Albums and select any album you want to download.

Step 3: Here you can add different albums to your playlist.
Step 4: After adding the albums to the playlist, you will see the iCloud download icon in front of the playlist icon.

Step 5: Click on the icon and the playlist will start downloading the songs.
How to Download Songs Using iCloud on Your PC or Mac
If you use a computer, you can download songs to your iPhone in a more convenient and comfortable method. You will only have to set up a few things in iTunes on your computer, and you will be ready to download the songs to your iPhone.Step 1: Launch iTunes on your computer and click on the File option in the top menu.

Step 2: Here click on New and select the Smart Playlist option.

Step 3: Here you will see a popup box with some different options. Here is how you can customize it.
Step 4: Now you need to “Select Time” from the second drop down box and “Is Greater Than” in the second.
Step 5: Now type 00:00 in the second menu. It shows the time duration of your songs.

Step 6: Uncheck Limit to option and check Live updating button. And after that click OK.

Step 7: Now come to your iPhone, open Music app and click on Playlists tab and after that open the folder with your favorite music.

Step 8: Eventually, you will see iCloud download button in front of your playlist icon. Click on it, and it will start downloading your songs.

You can choose either method to download all Apple music to iPhone and iPad. All the methods described above are very easy to understand and perform. After downloading the songs, you will be able to listen to them without the internet.


কোন মন্তব্য নেই:
একটি মন্তব্য পোস্ট করুন