

But, I know you are not among those who have the only option of feeling bad. I know you try, and good news is that you are at right place now. You can now bypass iCloud activation lock through a ritual DNS server by changing your WIFI DNS IP Address.
Bypass iCloud Activation Lock
However, it is here to mention that this is not an everlasting option for you. Still, you can let functioning in to the product to get the important details. Apart from this, you can take the activation locked product in to account to bypass iCloud activation lock and enjoy internet, games, apps, videos, etc. on your iPhone or iPad with iOS 9.3.5 installed.Don’t have any baffle in mind; the procedure has been applied with iPhone 4, 4s, 5, 5C, 5S, 6, 6 Plus, 6S, 6S Plus, 7, 7+ and the other devices like iPad, iPod Touch, iPhones on the current iOS 10.3.3, 11, 10.3.2, 10.3, 10.2, 10.1.1, 10.2.1 beta, 10, 9.3.5 / 9.3.3 / 9.3.2 – 9.0 / 8.4.1 / 8.4 / 8.1.3 firmware. In short, it can be pretty handy for you. Below here we have mentioned the step by step iCloud activation bypass procedure to get the job done. Have a look and try it out!
How to Bypass iCloud Activation Lock – Video Guide
Steps to bypass iCloud Activation lock:
- First change the DNS server in your WIFI settings as 78.109.17.60 or use other IP address.
- Now take your locked idevice and move to the last activation step and pick the ‘Activation Help’ option that is going to boot you through the ritual site. Now you have the interesting options like playing games, watching videos, internet, etc.
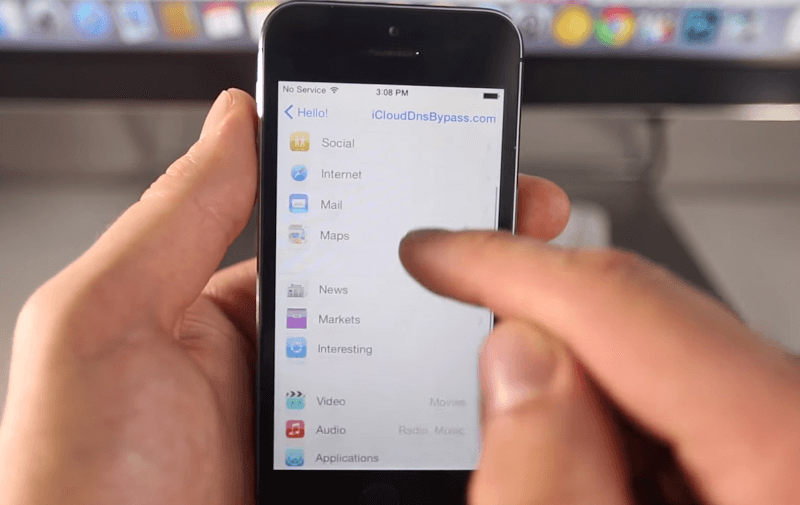
Steps To Completely Bypass iCloud Activation
- Move over the ‘Applications’ option and tap the ‘Crash Test 1’. This is going to reprising your stuff.
- Move over to the WiFi settings and hit the ‘i’ and pick ‘Manual’ option over the ‘http proxy’ zone.
- No list thirty distinct emoji icons to the ‘Server’ and type ‘8888’ over the ‘Port’ zone.
- Now hit back and then next, and move over the slide to unlock. Then hit the language options. Don’t just click; rather click with an effort for some minutes so that it can be booted over the display.
- As the home screen becomes available, you can now open three options, Phone, Newsstand and Facetime.
- It is here to mention that now you have to put again a little more effort by holding Power and Home button each time you open and application to restart the product and facilitate the process.
- Now go through Facetime where you can have the mail of the last user to whom you can contact through mail and enquire whether the device be taken of the iCloud. If you are not finding the mail, then continue the iCloud bypass process and go through the iPhone application to witness the contact number of the concerned person.
Update #1 January 2016: The solution was tested and works fine with the latest iOS 9.1 & 9.2 beta firmware.
Update #2 October 2017: The iCloud DNS bypass server was tested and works with 11, iOS 10.3.3, 10.3.2, 10.3, 10.2.1, 10.1.1, 10, 9.3.5, 9.3.3, 9.3.2 & lower firmware
কোন মন্তব্য নেই:
একটি মন্তব্য পোস্ট করুন