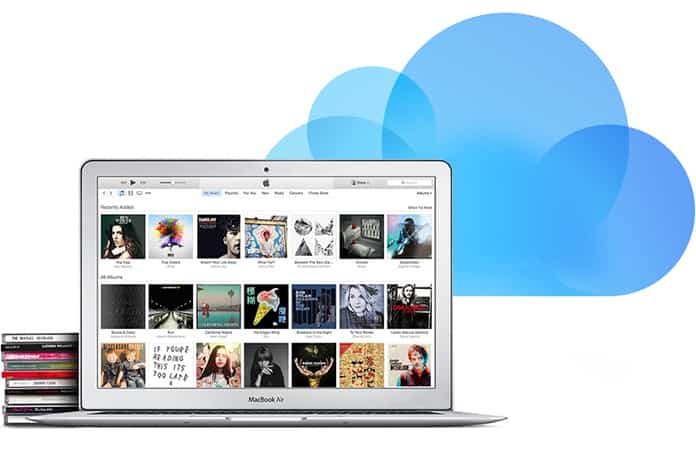
Well, the solution for the issue is quite simple. Thanks to the iCloud Music Library, you can easily store local music files in the cloud and access it from anywhere on a computer with iTunes installed.
Sounds, interesting, right!
Well, read on to find out how you can enable the iCloud Music Library on Mac, Windows PC or iOS devices.
Steps to Enable iCloud Music Library in iTunes
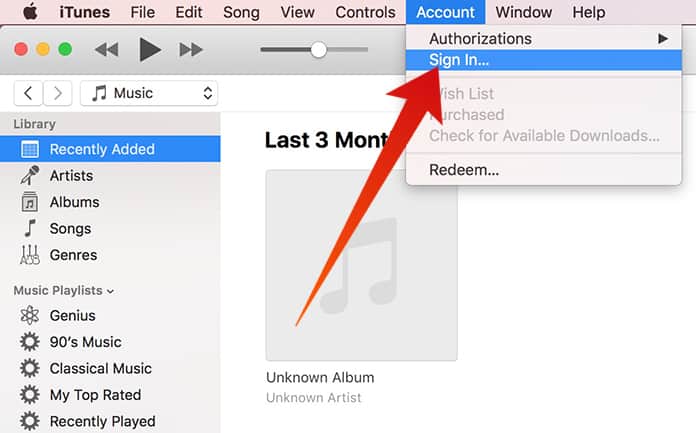
To enable iCloud Music Library in iTunes, simply open the iTunes on the computer which has all the local music stored. After that follow the steps below:Step 1: Go to Account, located in the top menu, right below the volume control, and click on “Sign in”.
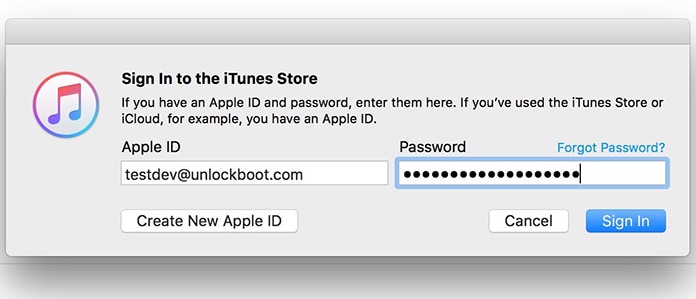
Step 2: Enter your Apple ID and password and click on “Sign in”.
Step 3: Click on the “Edit” option located right below the media controls and go to “Preferences”.
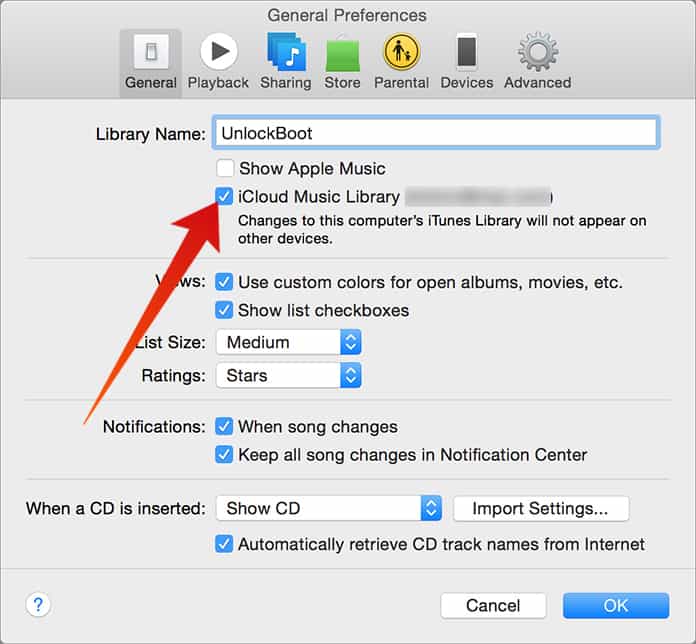
Step 4: Check the box right next to “iCloud Music Library” and click OK.
After these steps are completed, you will notice that iTunes is uploading your entire iTunes library inclusive of local music files to Apple’s iCloud.
Please note: The upload time will vary depending on your internet connections and the number of songs you have in your library.
Now all you have to do is get on any other computer with iTunes installed and repeat the steps above to enjoy your favorite music.
Enable iCloud Music Library on iPhone, iPad or iPod Touch
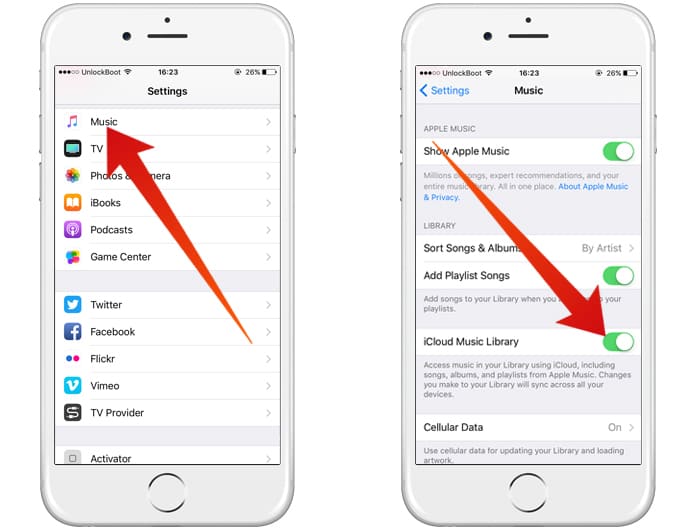
Similar to iTunes, you can also enable iCloud music library on your iOS Device. Just go to “Settings” on your iOS device and then to the “Music” section. Here, you will immediately notice the toggle to enable/disable the iCloud Music Library. This will allow you to access the music in your library using iCloud including the songs you have present in your Apple Music.
Read Also: Best Apple Music Alternatives for iPhone


কোন মন্তব্য নেই:
একটি মন্তব্য পোস্ট করুন